Still looking for the ultimate upgrade on a bike, we have switched from stock Campagnolo steel bearings to CeramicSpeed ceramic hybrid bearings.
The procedure is quite easy but it still requires some special tools we can’t find in any local bike shop. Since Campagnolo doesn’t provide the tools to extract the bearings yet, we had to get the tools ourselves.
Thus, you will need a simple and common bearing extractor, some special parts to press or extract the bearings without damaging them.
The extractor
The bearing extractor claws have to be quite thin to fit between the bearing and the crank arm. Considering the price difference between a cheap and high-cost extractor, a low end model is really enough for a normal use such as a bike application.

The "blocks"
To extract the bearing, a round block of 3 cm of diameter will push the Ultra-Torque axle while the extractor jaws will pull the bearing. Its thickness depends on the material, our one was in plastic and was 1.5cm thick.
To insert the new bearing, the block is like a plastic tube that will "connect" the UT axle to push the bearing deep inside its housing.

Extracting the bearing
Once the spring to secure the drive side crank arm is removed and the axle fixing bolt is screwed down, pull off both crank arms to you.
Place the small block (or anything that can protect both the spindle and the rod of the extractor) between the spindle and the rod, place the extractor jaws under the bearing then screw up until the bearing leaves its bed.
Take care, the bearing are blocked by small rings. Mind to remove it before the extraction!


The installation
First remove any residue of grease from the axle and the crank arm, slide the T61805 (T for thin) bearing around the axle then insert it until you reach the stop.
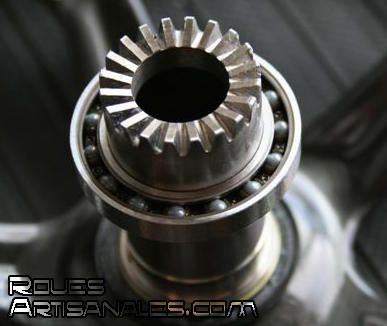
From this point, use the second block fitting the UT semi-spindle to press the bearing against the crank arm. A mallet can help you to push the bearing via the block that, at the same time, absorbs the vibrations and reduce the shocks.

Grease the bearing so it won’t see any water or dust. If you are looking for ultimate performance, then a very small quantity will reduce the friction and so the bearing smoothness. If you prefer to avoid the servicing operations, then feel free to add a good quantity of grease.


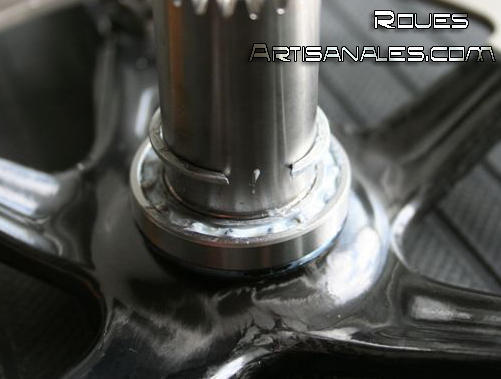
Installed bearing

The last settings are important too!
The bearing installation is done, you now only need to mount back the crank arms. Keep in mind the ring to block the bearings, the wave washer between the two semi spindles and the spring to secure the drive side cup. Finally, insert the fixing bolt from the right side, then tighten it.
The torque has to be between 42N.m et 60N.m. See this pdf.
Full crankset installation procedure can be found here.


Now you just have to take the best of the new bearings!
Previous Roues artisanales article about ceramic bearings (published as well in the french magasine L’Acheteur Cycliste") : 1, 2